build_embed_linux_system
Linux平台问题解决方法
在Linux平台使用过程中,经常遇到各类问题,这些问题按照类型分为命令执行问题,编译出错问题和系统运行问题;因为不同系统的权限,系统版本不同,软件和库支持的情况不同,导致遇到的问题往往各式各样,因此指望一篇总结能解决所有问题是不可能的,这里只是列出我在学习和开发中遇到的问题总结,目录如下。
- 编译相关问题
- apt下载相关问题
- No sandbox user “_apt” on the system
- Couldn’t create temporary file /tmp/apt.conf.SrjS4U for passing config to apt-key
- Certificate verification failed: The certificate is NOT trusted.
- Can’t locate Term/ReadLine.pm in @INC
- dpkg install shows haves been locked
- dpkg: error processing package xxx (–configure)
- Command ‘python2’ not found
- /usr/bin/env: ‘python’: No such file or directory
- after remove dock, apt-get warning about docker list
- libc.so.6: version ‘GLIBC_2.36’ not found
- Release file for (host) is not valid yet (invalid for another 12d 23h 18min 14s)
- GPG error, (host) trusty Release: The following signatures couldn’t be verified because the public key is not available
- 如何创建apt私有源
- Could not get lock /var/lib/dpkg/lock - open
- dpkg: error processing archive /var/cache/apt/archives/texlive-generic-recommended_2013.20140215-1_all.deb (–unpack)
- /usr/bin/mandb: can’t chmod /var/cache/man/CACHEDIR.TAG: Operation not permitted
- disk加载和卸载问题
- 网络相关问题
- 系统软件执行问题
- 支持wsl2相关问题
- 桌面相关问题
featurelist-00
feature-00-01
feature报错: section mismatch in reference: platform_driver (section: .data),wdt_probe (section: .init.text)
原因: 函数的前缀声明区域为init,实际为.data
解决办法: 去掉前缀init
featurelist-01
feature-01-01
feature报错: apt安装结束报错No sandbox user “_apt” on the system
原因: 一般出现在沙箱运行中,如docker或者chroot,系统不存在_apt用户,无法进行更新,可以手动添加。
解决办法
# 增加_apt的组和用户名
groupadd -r _apt && useradd -r -g _apt _apt
feature-01-02
feature报错: apt安装报错,Couldn’t create temporary file /tmp/apt.conf.SrjS4U for passing config to apt-key
原因: 这种情况一般为/tmp权限不正确,特别时构建文件系统时。理论上/tmp权限需要为”drwxrwxrwx”.
解决办法:
#/tmp目录权限不支持创建文件
sudo chmod 777 /tmp
feature-01-03
feature报错: Certificate verification failed: The certificate is NOT trusted. The certificate featurer is unknown. Could not handshake: Error in the certificate verification
原因: 当前的认证工具不被apt识别,可能是版本问题过低
解决办法:
不支持的认证环境,执行命令
apt-get install ca-certificates --reinstall
安装失败则去官网下载:http://archive.ubuntu.com/ubuntu/pool/main/c/ca-certificates/, 通过dkpg -i安装。
feature-01-04
feature报错: Can’t locate Term/ReadLine.pm in @INC (you may need to install the Term::ReadLine module
原因:perl缺少模块库,打印错误
解决办法:
apt install libterm-readkey-perl -y
feature-01-05
feature报错: dpkg install shows haves been locked.
原因:dpkg或者apt安装过程,意外停止,重新更新
解决办法:
sudo rm /var/lib/dpkg/lock
sudo rm /var/lib/dpkg/lock-frontend
sudo rm /var/cache/apt/archives/lock
feature-01-06
feature报错: dpkg: error processing package xxx (–configure)
原因: 尝试安装或者删除某个文件时候出错,残留了cache文件,导致异常,需要清除缓存
解决办法:
mv /var/lib/dpkg/info/ /var/lib/dpkg/info_old/
mkdir /var/lib/dpkg/info/
apt-get update
apt-get -f install
mv /var/lib/dpkg/info/* /var/lib/dpkg/info_old/
rm -rf /var/lib/dpkg/info
mv /var/lib/dpkg/info_old/ /var/lib/dpkg/info
feature-01-07
feature问题: Command ‘python2’ not found.
原因: 某些原因误删除了系统中的python2,导致系统运行异常(部分软件依赖python2作为基础环境)
解决办法:
sudo apt-get remove python2.7-minimal
sudo apt-get install python2.7-minima
feature-01-08
feature问题:执行py文件报错,”/usr/bin/env: ‘python’: No such file or directory”
原因: 系统中/usr/bin/python未链接,导致找不到
解决办法:
sudo ln -sf /usr/bin/python3 /usr/bin/python
feature-01-09
feature问题: after remove dock, apt-get warning about docker list.
解决办法: 移除docker后,apt中docker相关的配置未移除
# 删除sources.list.d下与docker相关的更新目录
rm -rf /etc/apt/sources.list.d/dock*

# 删除lists下的dock相关文件
rm -rf /var/lib/apt/lists/docker*
feature-01-10
feature问题: libc.so.6: version ‘GLIBC_2.36’ not found
原因: 编译软件的gcc版本和高于文件系统的C库,链接后就导致版本过低报错
解决办法:
# 对于系统中,libc地址可以查看支持的GLIBC版本
strings /lib/x86_64-linux-gnu/libc.so.6 | grep GLIBC

# 降低gcc版本,适配系统
feature-01-11
feature问题: Release file for https://mirrors.tuna.tsinghua.edu.cn/debian/dists/bookworm/InRelease is not valid yet (invalid for another 12d 23h 18min 14s). Updates for this repository will not be applied
原因:系统时间问题和服务器不一致,导致不能够匹配
解决办法:
# 更新系统时间,下载ntpdate
sudo apt-get install ntpdate

# 更新时区和同步时间
ln -sf /usr/share/zoneinfo/Etc/GMT-8 /etc/localtime
sudo ntpdate pool.ntp.org
feature-01-12
feature问题: GPG error, http://us.archive.ubuntu.com/ubuntu trusty Release: The following signatures couldn’t be verified because the public key is not available
原因: 编码key不符合gpg问题
# 在系统中添加相应的key
sudo apt-key adv --keyserver keyserver.ubuntu.com --recv-keys [key]
W: http://us.archive.ubuntu.com/ubuntu/dists/trusty/Release.gpg : Key is stored in legacy trusted.gpg keyring (/etc/apt/trusted.gpg), see the DEPRECATION section in apt-key(8) for details.
cp etc/apt/trusted.gpg /etc/apt/trusted.gpg.d/
feature-01-13
创建apt私有源的方法。
编译Linux环境下可运行程序,类似hello文件,打包package文件以及生成目录文件。
- 生成deb文件
# 创建package目录
mkdir package
cd package
mkdir -p usr/bin
mv ../hello usr/bin
mkdir DEBIAN

# 创建control文件
vi DEBIAN/control
####################################################
Package: private
Version: 1.0
Section: custom(代表软件类别)
Priority: optional
Architecture: all
Essential: no
Installed-Size: 1024
Maintainer: private.org
Description: Print test strings on the screen
####################################################

tree

#生成deb文件
cd ../
dpkg-deb --build package/ private.deb
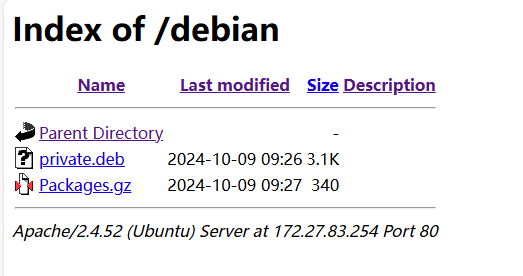
- 生成gz文件
cd /var/www/html
mkdir debian

cp private.deb debian/
su root
sudo dpkg-scanpackages . | gzip -c9 > Packages.gz
- 通过浏览器访问即可,如下所示。
feature-01-14
E: Could not get lock /var/lib/dpkg/lock - open (11: Resource temporarily unavailable)
E: Unable to lock the administration directory (/var/lib/dpkg/), is another process using it?
| 用”ps -a | grep apt”查看是否有进程占用,如果发现,直接使用sudo kill [id], 或者直接重启。 |
feature-01-15
dpkg: error processing archive /var/cache/apt/archives/texlive-generic-recommended_2013.20140215-1_all.deb (–unpack)
# 覆盖出错的文件
sudo dpkg -i --force-overwrite /var/cache/apt/archives/texlive-generic-recommended_2013.20140215-1_all.deb

# 自动移除相应的依赖工具
sudo apt automove
feature-01-16
/usr/bin/mandb: can’t chmod /var/cache/man/CACHEDIR.TAG: Operation not permitted
原因: /var/cache/man目录下文件权限不正确
# 执行权限修改命令
sudo chown man:root /var/cache/man -R
sudo chmod g+s /var/cache/man -R
featurelist-02
feature-02-01
feature问题: umount dir: target is busy
原因: 目录被占用,导致无法被移除
解决办法:
# 查询占用进程
lsof [dir]

# 清除占用进程
pkill -9 [process]

# 移除文件系统
sudo umount [dir]

# 移除指定目录上挂载的块设备,被占用会等待占用解除后移除
sudo umount -l /media/run/
feature-02-02
feature问题: mount: /dev/mmcblk1p1: can’t read superblock
解决办法:
sudo umount /mnt/sdc

# 修复指定问题
fsck.ext4 -v /dev/mmcblk0p1
fsck.ext4 -v /dev/mmcblk0p2
featurelist-03
feature-03-01
feature问题: 在sudo使用命令,报错 sudo: unable to resolve host DESKTOP-SO7SONV: Name or service not known
在/etc/hosts中增加解析。
127.0.0.1 DESKTOP-SO7SONV
feature-03-02
feature问题: 开发板支持nfs-v2时,无法连接新版本ubuntu
原因: 开发板使用的Kernel如果版本过低,只支持nfs-v2版本。较新的Ubuntu内核版本v6.x.x移除了nfs-v2的相关库支持。此时解决这个问题有两个办法:
- 移植比较新的kernel,使用nfs-v3版本连接(命令添加nfsvers=3)
- 替换旧版本的内核,修改nfs版本支持v2
解决办法:
这里提供通过命令替换加载内核,开启v2支持的方法。
#Ubuntu端更新内核
#安装新的Linux内核
sudo apt-get install linux-image-5.19.0-41-generic

#更新GRUB_DEFAULT
sudo vim /etc/default/grub
GRUB_DEFAULT="Advanced options for Ubuntu>Ubuntu, with Linux 5.19.0-41-generic"

#更新grub
sudo update-grub

#重启系统
reboot
对于NFS访问需要提供tcp和v2的配置。
#更新nfs文件
sudo vim /etc/nfs.conf

#使能功能
tcp=y
vers2=y
此时使用v2版本的nfs可以进行连接。
feature-03-03
feature问题: ping the outer ipadress success, but outer host failed。
原因: 系统网络连接正常,而dns服务器异常;导致使用ping命令不能直接访问host网址
解决办法:
在/etc/resolv.conf增加dns服务器支持
# /etc/resolv/conf
nameserver 223.5.5.5
nameserver 8.8.8.8
nameserver 8.8.4.4

sudo /etc/init.d/networking restart
# 如果networking不存在,使用
sudo /etc/init.d/network-manager restart
如果外网github等,可能有dns污染,通过/etc/hosts指定网址的IP地址(或者使用其它可用ip地址)。
#/etc/hosts
github.com 20.200.245.247
featurelist-04
feature-04-01
feature问题: 在sudo使用命令,报错 sudo: /usr/bin/sudo must be owned by uid 0 and have the setuid bit set
原因: sudo命令权限有特殊要求,需要属于root用户(uid0)
解决办法:
# 在root权限下处理
chown root:root /usr/bin/sudo
chmod 4755 /usr/bin/sudo
feature-04-02
问题: bash run, with error shows “$’\r’: command not found”
解决办法: 文件换行符需要从\r\n切换为\n, 如果文件较多用dos2unix进行转换
#使用dos2unix转换文件
sudo apt-get install dos2unix
find ./ -exec dos2unix {} \
feature-04-03
feature问题: chroot run exe, show “no exec format”
- 未安装虚拟机工具
sudo apt-get install qemu-user-static
- 无法指定相应的虚拟机工具,可通过如下步骤实现
cp /usr/bin/qemu-arm-static usr/bin/
chmod +x usr/bin/qemu-arm-static

#指定虚拟机软件
sudo chroot root/ /usr/bin/qemu-arm-static /bin/sh
feature-04-04
脚本执行报错: -sh: /home/sys/shell/bringup_shell.sh: not found
发生报错问题,检查步骤。
- 检查ls命令查看目录下是否有此文件,名称是否正确
- 使用ls -alF命令,查看文件权限,是否可执行
- 使用cat [file]命令,看文件头是否指定执行shell环境,shell环境不一致也会报该错误
featurelist-05
feature-05-01
feature 问题: free the wsl2 not used memory.
首先需要将虚拟硬盘空间写零, 回收WSL中未使用的空间
wsl>fstrim -a 随后使用Diskpart工具中的compact功能压缩磁盘镜像文件
# 彻底关闭 WSL2 虚拟机
wsl --shutdown

# 新开一个 Diskpart 窗口
diskpart

# 指定 WSL2 虚拟机磁盘镜像文件位置
# 引号内为ext4.vhdx虚拟磁盘位置
# 全局查找ext4.vhdx
select vdisk file="C:\Users\lx176\AppData\Local\Packages\CanonicalGroupLimited.Ubuntu22.04LTS_79rhkp1fndgsc\LocalState\ext4.vhdx"
# 只读 附加磁盘镜像文件
attach vdisk readonly
# 压缩 vhdx 磁盘镜像文件
compact vdisk
# 分离 vhdx 磁盘镜像文件
detach vdisk

# 退出
exit
featurelist-06
feature-06-01
VNC桌面无法打开终端:Failed to execute default Terminal Emulator. Input/output error
解决办法:
依次打开Application => settings => Default Application。在Utilities中Termial Emulator中选择”xfce Terminal”
feature-06-02
feature问题: 根据源码来编译gcc实现
# 下载gcc
wget https://mirrors.tuna.tsinghua.edu.cn/gnu/gcc/gcc-12.2.0/gcc-12.2.0.tar.gz

tar -xvf gcc-12.2.0.tar.gz
cd gcc-12.2.0/

# 下载gcc编译支持环境(需要和download_prerequisites中相匹配)
# 使用gcc中定义的最新包
wget https://mirrors.tuna.tsinghua.edu.cn/gnu/gmp/gmp-6.2.1.tar.bz2
wget https://mirrors.tuna.tsinghua.edu.cn/gnu/mpfr/mpfr-4.1.0.tar.bz2
wget https://mirrors.tuna.tsinghua.edu.cn/gnu/mpc/mpc-1.2.1.tar.gz
wget https://gcc.gnu.org/pub/gcc/infrastructure/isl-0.24.tar.bz2

apt-get install gzip libtool

# 配置编译环境
./contrib/download_prerequisites

# 执行gcc编译
./configure --enable-checking=release --enable-languages=c,c++ --disable-multilib --prefix=/home/center/install/gcc12/
make && make install
附加相关软件的交叉编译方法。
# gmp交叉编译方法
./configure --host=arm-none-linux-gnueabihf --prefix=/home/freedom/sdk/download/tmp/install/

# mpfr交叉编译方法
./configure --host=arm-none-linux-gnueabihf --prefix=/home/freedom/sdk/download/tmp/install/ --with-gmp=/home/freedom/sdk/download/tmp/install/

# mpc交叉编译方法
./configure --host=arm-none-linux-gnueabihf --prefix=/home/freedom/sdk/download/tmp/install/ --with-gmp=/home/freedom/sdk/download/tmp/install/